New Blog!

Please visit me at my new blog, PrettyLittlePaperThings for new and exciting posts!
Showing posts with label QuicKutz. Show all posts

Tuesday, January 11, 2011

My QK Revolution has gone to a loving new home!!

I am very happy to announce that my QK Revolution, the original case and 4X4 cutting surface and embossing plate, my lovingly used 12" cutting surface, a 4X8 alphabet, another alphabet, a 4X4 flourish die, the cookie cutter circles and squares and about 10+ 2X2 dies and die sets plus a zippered QK binder barely used to store these dies...  have been sold to Melissa for $50 (who's going to start a blog one day lol) and I am so happy to have delivered it yesterday!  Thanks to those of you who were interested but the deal is done :)

You got it M!
Woot! Woot!
cut cut stick stick wow wow
tee hee!
All the best!
Nikki

Monday, January 10, 2011

Wedding Album for Ren'neeeigh!

Once completed, this would be my third complete album that I have made in the last 12 months for someone else!!!  The first time I did it, it was a pregnancy album for my sister in law... that was fun!  The next time, someone paid me quite well... not so much fun!  The third time was a labour of patience and grudgingly, I just got it done, and finally, on her first wedding anniversary my little cousin asked me if I would create a beautiful album with texture because nothing she could buy would ever compare to the little samples she's seen of my work - so how could I say no - I'm a sucker!!!  Her Hubby is off in Iraq and he'll be home in July so I have plenty of time to finish it and ship it but I was inspired and completed all but 6 pages within a week!

Here are some teasers ...

The first page, simple elegance... 
sorry for the glare, I'll try and crop it out 
from the rest of these pics

Still making flower centres with a little bling, 
the same style continues on the next page

Yeah, Prince Charming had that gorgeous dress 
draped over Duke the stallion!
She trains horses for a living, 
so riding in a wedding dress 
with full-out train and heels 
was nothing for her ;)

texture, texture, texture...

And those leaves have shimmer (from Michael's) 
and they match her eyes!!!

so... Ren-neeeeigh... HAPPY BIRTHDAY
and if you've seen this you HAVE to tell me!!!

I'll try to get some pics of the other albums I've completed and given away already, since they are the real reason I was such a delinquent blogger for a few months tee hee!! BUT.. a blog re-launch in in my near future :)

Enjoy,
Nikki

Saturday, January 1, 2011

Happy 1/1/11 !!! ... and I'm selling my beloved QK Revolution & dies!!

Oooh I sure hope this year keeps each and every one of you happy, healthy and inspired to create pretty little paper things!!

To start the new year, with the help of my brand spankin' new iPhone4 (insert wild cheering here) I will have no excuse for not having a camera nearby lol. So without haste, here's my evolved and messy craft area, I call it "Grand Central Station" because everything is within an arm's reach, including my laptop under the table to the left running my Silhouette digital craft cutting machine!!  Notice to the left, up past the ribbon, and the Silhouette cutter is my brand spankin new Big Shot express *insert even wilder cheering here* that I have been waiting four months for since I got it at 60% off with free shipping (to the US) so I had to wait for Hubbyto go get the darned thing from Florida, but it was well worth the wait!!

...look to the left...

... my cockpit, everything within arms reach ...
... and look to the right...

So, since I have this new Big Shot, I am selling my QK Revolution... and quite a few 2X2 and alphabet dies that I have lovingly used so much that my Hubby even recognizes them in my scrapbook - eek!!

If you are interested, drop me a line before I put it up on Kijiji and eBay because I still have the original 4X4 platform, and am selling it with the 12X4 long platform and the original case.  Because I am in the Toronto area, it will be quite a hefty shipping price I'd imagine to the US or oveseas, so if you are a local gal... happy new year!!!  It'll be yours for a little more than a penny in the pan!!  And if you are interested in some well loved, gently used dies - let me know!!


I'll also add a video of my book of dies as well :)
Please email me if you are interested.


Have a haapppppy new year!!
Nikki

Friday, August 20, 2010

She's been so good to me...

... and all she wanted was a medium-double-double, so here's my thank you using a cardboard hand protector that I fixed up using the Kioshi paper pack, my QuicKutz 2X2 dies, spellbinders scalloped circles, stickles, some awesome brads, my Cropodile, ribbon from my stash and some Tim Holtz distress inks.  So, off I go to get her coffee, to use this cute hand protector with... BTW, the flower is the part the hand cannot reach, so it's not in the way, and the ribbon is soft on the hand - I love it!!


Have a wonnnnderful day!

· ´¨¨)) -:¦:- -:¦:-
¸.·´ .·´¨¨)) Live with integrity.... -:¦:-
((¸¸.·´ ..·´ Create with passion!
-:¦:- ((¸¸.·´* -:¦:- NikkiNix

http://prettylittlethingstocut.blogspot.com


Sunday, May 2, 2010

My Creating Space/Scrap Room-Part 3.2


So in this post you are going to see sneak peaks of my Fresh new crafting area LOL, it's not quite ready for reveal but it's getting close!!  The peg board is up, the ribbon is up, all of my crafting supplies are in the area, accessible and sorted and now... the clock is up too :)  I need a few more shelves, and a bit more organizing to make it all "work" at a hand's reach and ta daa!!!  Soon.. I promise ;)

Today was my last trip to Ikea to get some more of these absolutely wonderful glass jars for all my embellies.  It'll be like an apothcary/candy store :)  Siiigh... being able to see what I got is so so soooo fun!  I also grabbed this jar for tidbits of ribbon so they can be handy, visible and cute.

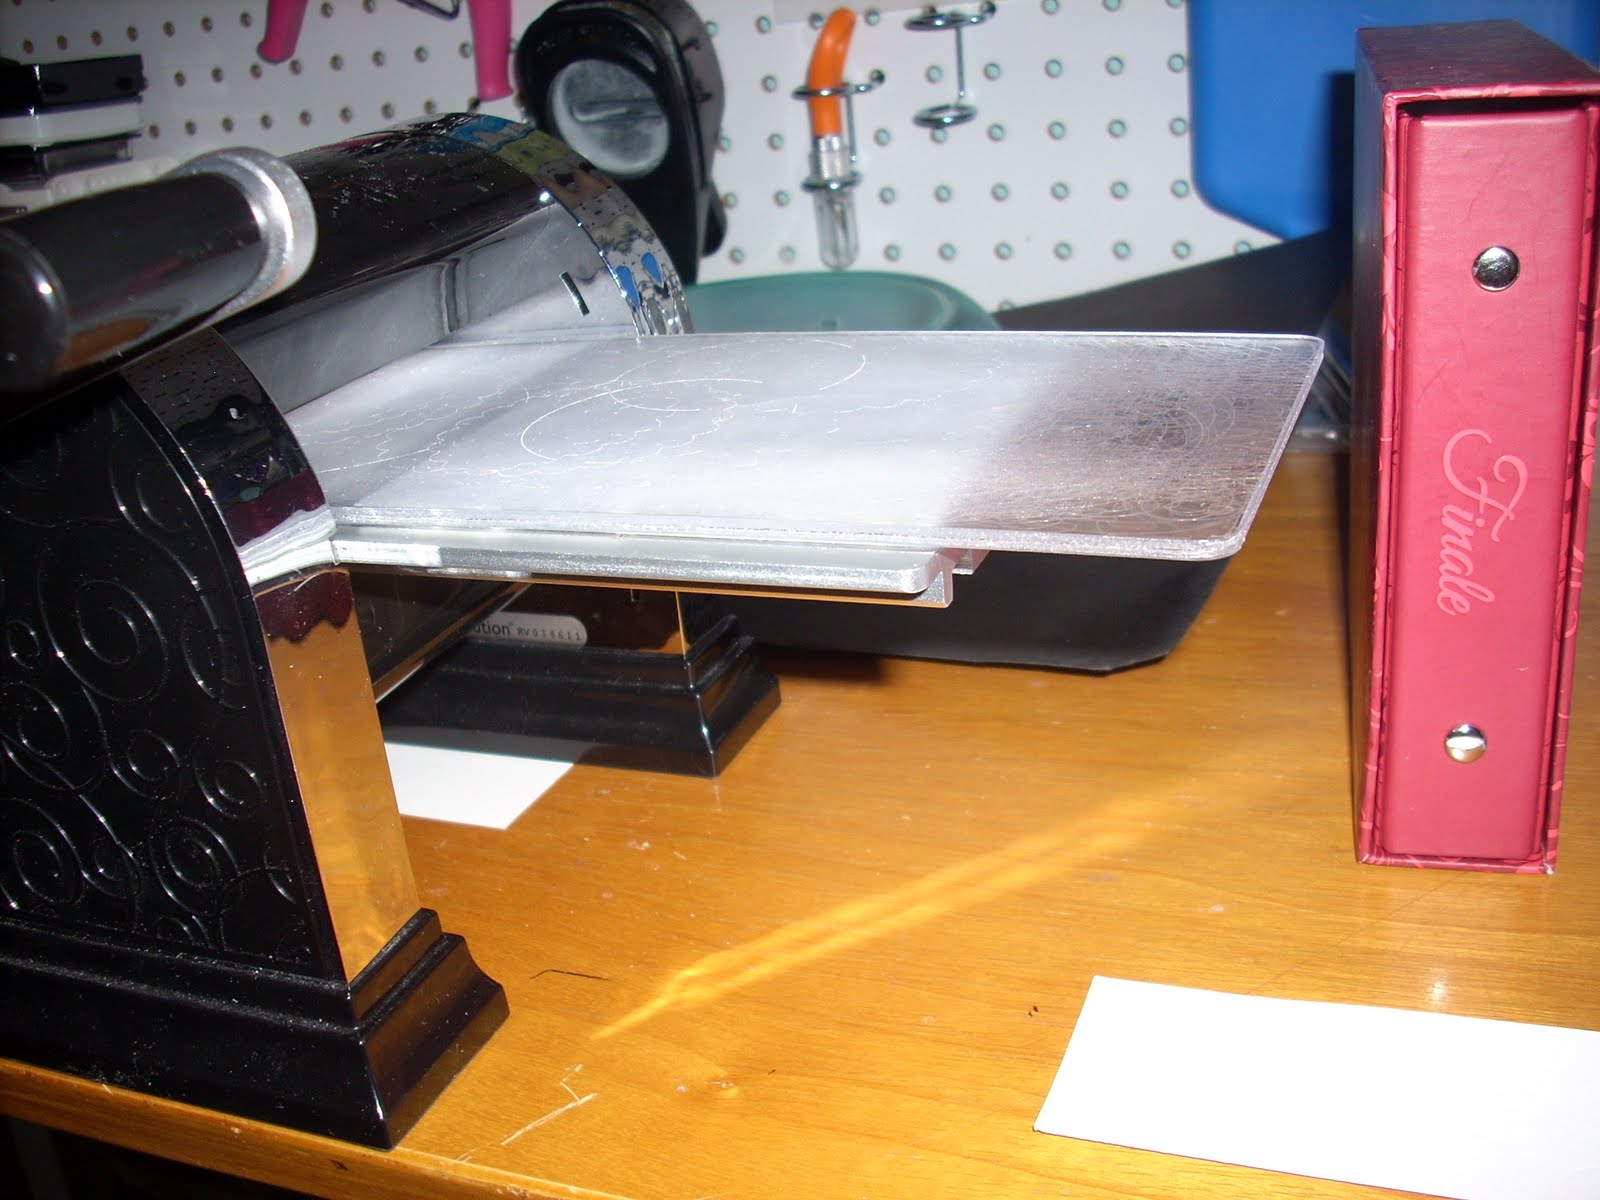
So today, I've altered the Rusch clock from Ikea - at $2.99 + a $0.33 sheet of patterened paper, some scrap white that I rolled through my QK Revolution using my Finale alphabet and it's the cutest clock a girl ever had!!

Here's what I did:


Took it all apart - it easy pretty easy, paying attention tot he way the minute/second hand attached for reassembly later.

Used the clock face paper template to cut out my water paper background.  Have I mentioned recently how much I looove these scissors?! I touched up some bad cutting with Copic markers to hide the white, and used my finger knife to cut out the center circle.


Then I airbrushed the plastic clock frame.

And stamped a totally unknown stamp randomly using stazon ink straight on with my hand as the base so I could curve it.

Then I cut out my numbers using my QK Revolution and the Finale alphabet
*SPOILER* you can see my peg board in the background ;)

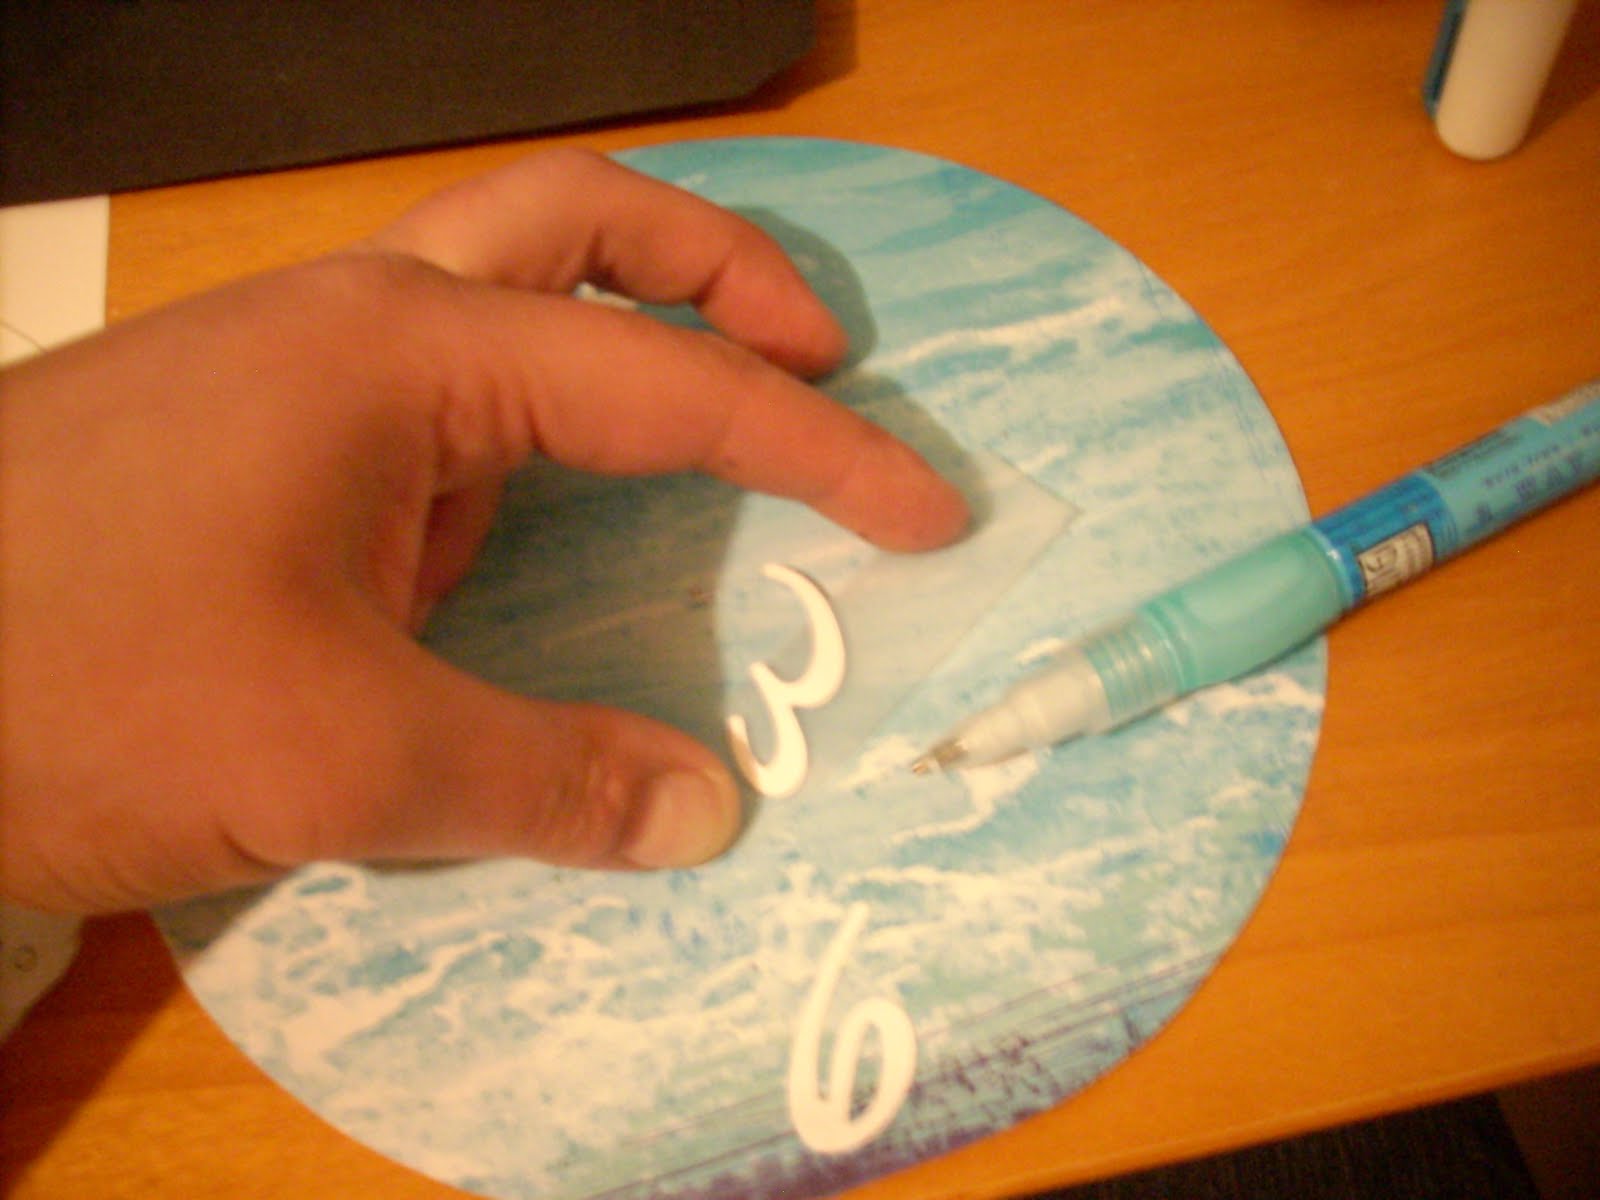
Stuck on the numbers using reposition able tape and my zig pen glue

And there we have it, all the tools used 
(+QK Revolutionand alpha)

I've submitted this for the Copic Challenge#27 - using Copics on other surfaces too - yay, don't I looove me a challenge!!

· ´¨¨)) -:¦:- -:¦:-
¸.·´ .·´¨¨)) Live with integrity.... -:¦:-
((¸¸.·´ ..·´ Create with passion!
-:¦:- ((¸¸.·´* -:¦:-    NikkiNix

Monday, January 4, 2010

JustRite 1-5/8" circle stamps

Oh I have to tell you, I really love my 1-5/8" JustRite stamps, but haven't used them as much as I'd like to since I just have no idea how to get these babies cut nicely into circles. I've stamped and made all kinds of combinations and practiced using my new Copic airbrush system to fade the colour of the circle for future tags and cards and am totally stumped with how to get my circle cut :( Any advice?

While I am on the topic, I am so tempted to get the new JB-09720 Romantic Sentiments Centers Round 1-5/8" and the JB-09725 Loving Thoughts Centers 1-5/8" because I love them so - just holding out bacuse of "shipppiiinnnggggg" LOL :)

Now, since I started this post (and left it in drafts for awhile) I have gotten some generous advice from out in Bloggyland, including this JustRite stampers punch and die compatibility chart and this Spellbinders Compatibility Chart As for the outcome on my circle-cutting challenge, I was also led to the JustRite blog where she used the 1-3/4" EK Success circle punch which was pretty neat, but seemed bulky and limiting and would have cost me a fortune to ship to Canada, sooo... off to eBay I went and snagged me the Spellbinders large circles set (plan to use the 1⅞ circle primarily for the 1-5/8" circle stamps) and since I am paying shipping on this beautiful nice flat package, I had to throw in one or two other goodies to sweeten the pot - you'll see them pop up soon ;)

Please note, I took advice from the Spellbinders Compatibility Chart re: Revolution™ by QuicKutz®

This machine may be used to cut and emboss Spellbinders dies.
How-To Cut with Spellbinders Dies
1. Place die onto Revolution platform (cut side up).
2. Place paper or cardstock on top of die.
3. Place acrylic cutting mat on top of die.
4. Roll thru Revolution machine.

How-To Emboss with Spellbinders Dies
1. Remove acrylic cutting mat.
2. Leave die in place with die cut still inside die.
3. Place Spellbinders tan embossing pad on top of die.
4. Place Acrylic embossing mat on top of tan pad.
5. Roll thru Revolution machine.

· ´¨¨)) -:¦:- -:¦:-
¸.·´ .·´¨¨)) Live with integrity.... -:¦:-
((¸¸.·´ ..·´ Create with passion!
-:¦:- ((¸¸.·´* -:¦:- NikkiNix

Tuesday, December 22, 2009

Beautiful Exploding Boxes

Well now I've gone and taken this post to the next level with an even easier do-it-yourself tutorial I found over at DieCutsRUs :) Enjoy!!


Check out more box ideas at http://magic-boxes.blogspot.com/


· ´¨¨)) -:¦:- -:¦:-
¸.·´ .·´¨¨)) Live with integrity.... -:¦:-
((¸¸.·´ ..·´ Create with passion!
-:¦:- ((¸¸.·´* -:¦:- NikkiNix


Wednesday, December 2, 2009

Vinyl Cutting Ideas for your DigitalCraft Cutter

Wow! I know my digital craft cutter can cut vinyl, and I know that Quickutz sells cutter files for this purpose, but my imagination was seriously stretched when I began realizing the limitless possibilities of what (if I had the time) I could create. I found myself on the http://www.rightonthewalls.com website and it blew my mind! Check them out for some awesome products to purchase or ideas for your own inspiration.

For example, this rightonthewalls quote uses the Aquarelle FREE font that I first discovered when I did my daughter's first birthday thank you cards, how simple and stunning. You have to check them out and see what absolutely adorable things they have... especially the one for twins under the home and then nursery link - how awesome!!


· ´¨¨)) -:¦:- -:¦:-
¸.·´ .·´¨¨)) Live with integrity.... -:¦:-
((¸¸.·´ ..·´ Create with passion!
-:¦:- ((¸¸.·´* -:¦:- NikkiNix

Thursday, September 24, 2009

New free dingbat font for die cutters

Clever Someday has some gret tips for digital cutting.
The 09KutUps is a shapes font made especially for SCAL and other cutting machines that can cut truetype fonts. Every shape has been optimized for cutting. CLICK HERE and in the middle of the second paragraph it says "download font here" with the "here" in green


Just awesome!

Monday, June 22, 2009

Flower Pocket Card

Aren't they beautiful??

Here's the challenge and and an example of
the inside of this card idea made by Missie_coop


You can totally use the QuicKuts flowers and leaves that come with the Silhouette in the QK Library and resize them, cut a bunch in different colours and if you have the RM upgrade the QK Library now has leaves you can also cut and add. What am I talking about??

  1. Once you arrange and resize your flowers and leaves, save the file! Then save under another filename so you don't lose the integrity of the individual flowers.
  2. Then weld the whole flower & leaves bunch and make a mat. Remove the flowers now (they are in the previous file) and add a rectangle and weld that to the flowers background as your card base and cut!
  3. Remember to cut a bit of paper (by hand even) at the right size for your message to be written on as well.
  4. Now back to your original file with all the pretty stuff. Cut the leaves and flowers in different colours, be patient with yourself.
  5. Now you get to assemble!! YAY!
  6. To make the flower pot base, I'd just cut it by hand :) And... the ribbon is the only thing holding it closed according to the original directions.

You know I am talking to you - Miss.A!! Enjoy :)


Wednesday, May 27, 2009

FREE FILES - got your attention didn't I :)

CHEERS! If you are a new cutter owner and I really hope my blog is useful to you :)

When I first got my Cutter, I scoured the web for free files that I could play with and soon got frustrated because whatever project I was working on would take forever becasue I knew *exaclty what I wanted* and either had to buy it or find it for free online. Well, when searching for just the right cutter file, I encountered version issues, file type issues and incredulously I found a lot of great files and ideas and collected what I thought was a lot of free files - yippieee!! Like candy to a craft-addict!!!

Then, I had to figure out a filing system, and then I just got frustrated when the file I wanted to use needed just a little tweek here or there and one that could not be accomplished after I cut it. I was ready to cry at my Valntines Day attempt, I swear I wanted to throw my machine out the window!

I realized my creative brain was much too big for the software that came with the Silhouette. I broke down soon after and collected my pennies and invested in the greatest program - the KNK Studie GE software and WOW! Once I started playing with it and going over the tutorials that came with the purchase, and those free on iloveKNK.com and the fantastic user manual that came with - my juices were flowing.

So I was recently cleaning up a bit of old stuff because I am so loving my program that I dont really use GSD files anymore... I came accross my list of gold - which I have included below. I hope it helps some of you newbies, it sure helped me at the time but WOW... now, I don't BUY files - I create them in a blink of an eye!!

I'll even admit, I own a QuicKutz Silhouette and spent some money buying GSD Files and NOW... HA! I coudl create and cut those same files in just a few minutes - thanks to the KNK Studio GE Software.

Good luck, and happy cutting!!!


Tutorials and Tools

http://02af4c4.netsolstores.com/MachinecomparisonsTSI.htm
http://new.myfonts.com/WhatTheFont/

http://www.iloveknk.com/
http://scrapbooking.arnolds.net.au/forum/viewforum.phpf=4&sid=f43ec12b09c3248c2c091352550ffa09 (tutorials)
http://www.scrapbook.com/forums/showforum.php?fid/50/
http://www.batchconverter.com/image-converter.html
(change file types by group)
http://translate.google.com/translate?u=http%3A%2F2Fcrafty.actifforum.com%2F&langpair=fr%7Cen&hl=en&ie=UTF-8

Free GSD & KNK Files & For files sale

http://www.4shared.com/dir/15995478/45b64a0a/KNK_Files_by_Nikki.html
http://www.4shared.com/dir/12150434/f3b662f5/GSD_Files_by_Nikki.html
http://www.fam-bjork.se/monicas-hobbysida/
http://www.quillingpatch.com/category/freebie-friday/

http://02af4c4.netsolstores.com/index.asp?ageAction=VIEWCATS&Category=7
http://www.littlebit.com/cutter/cutter_files_index.html
http://02af4c4.netsolstores.com/index.aspPageAction=VIEWCATS&Category=7 http://creations.110mb.com/whatsnew.htm
http://www.timeforcrafting.co.uk/templates.html

http://www.collectedmemories.com/cgi-bin/WebObjects/cmStore.woa/wa/page?key=morefreediecuts
http://www.eduplace.com/rdg/hme/k_5/shapebook/toc.html

http://www.bosskutdesigns.com/
http://www.letsbescrappy.com/cutter_files/cutter_files.htm

I know there are more out there, you might also look for websites that have pdf files you can convert, or jpgs too.

A resource for GSD Junkies
CRAFTY, le Craft Robo
Davesangel
Dianas Designs
Great Scrappin Designs
Hinkeltje fotografie & scrapbooking
I Love Craft Robo
Jayrewcraft - GSD Downloads
JennieBean Crafts
Kreations By Katie
Looking Out
Monique
MyDieCuts.com
Mydiecuts
Paperthreads
Serialpurrs
Signmax.us
Sussann's Blog - Cutter Files
The latest by Mary
The Scrapbook Lady - GSD Downloads
Time for crafting
Ukscrappers - Craft Robo
Visual Designs By Chris
Wishblade Files
Wishblade GSD Files
Wishblade
http://www.scrapmag.info/crafty/index.php (French site - all free)
http://www.duckysdesigns.com/KNK/Freebies/freebies.html
http://wordpress.com/tag/free-gsd/
http://papercuttingfun.com/wishblade/
http://www.paperthreads.com/forum/index.php
http://aussiescrapsource.typepad.com/aussie_scrap_source/quickutz/index.html (Free .GSD)
http://www.paperthreads.com/ (mostly for sale) (message board for sharing)
http://scrapbooking.arnolds.net.au/forum/index.php
http://ukscrappers.co.uk/ (go to the Craft Robo part of the Forum)
http://www.designsbyduchess.com/dsphotography/wishblade/wishblade.htm http://www.thewishbladingwell.com/
http://greatscrappindesigns.com/store/Default.asp
http://www.thescrapbooklady.co.uk/catalog/gsddownload.php
http://www.jersgirl.com/temps.html (jpg templates) Matching QK &


TTF Fonts:
http://www.scrapbook.com/blogs/19078/view/3115.html
http://www.publicfont.com/category/quickutz.php
http://mamawslegacy.wordpress.com/ (blog; free files almost daily)
http://mamawslegacy.com/cut/cut.html (free cutting files)
http://mamwawslegacy.cuttersmarket.com/ (cutting files; files in gallery)
http://www.letsbescrappy.blogspot.com/ (inexpensive for sale)
http://www.visualdesignsbychris.com/store/home.php
http://www.digitalcraftcutters.com/id67.html

Ideas for creating:
http://www.letteringdelights.com/
http://www.deltaphiscrappa.com/DayCrop28.html
http://www.estiloweddings.com/CUPCAKE-WRAPPERS/cart.php?m=product_list&c=97

Monday, May 11, 2009

Tips & Tricks: QuicKutz Alphabet equivalents

Click on the pic for the link to the font equivalents - thanks Superpezgirl

Thursday, April 9, 2009

Silhouette Training manual

This is awesome!!
... and about time too...
for the Silhouette!!

I've stuck these pics on my wall for reference, it used to baffle my little brain ...


Saturday, March 14, 2009

Tips & Tricks: Removable Tape

I use Scotch 3M matte finish removable tape for all my die cutting.

I arrange the cut-out on my cutting mat (non-sticky) and put the tape on it, turn the whole taped thing over, add glue and position on my scrapbook page or card and press into place, then remove the tape strip.

This is how I would make my letters join when I was using the Quickutz Squeeze and then the Revolution. (Loving the weld feature on the QK Silhouette that does it for me now!)

I pride myself on still being on the same roll for 4 years, that's how much I re-use the tape strips. PLUS I can't find the darned stuff anywhere even if I wanted another roll :(

Question: What do you guys use and how do you add your adhesive and position your little pieces???

Sunday, February 15, 2009

My Valentines card was a real flop!


Siiiigh... I'm still a little irritated at my machine, and more irritated that it is user error! So, I had my file ready for Valentines, went to the store and bought all the same "type" of paper in the colours I'd need for the card and was all excited at my first big project.

(GASP! Using whole 12X12 sheets, cutting to 8.5x11 to feed through the cutter!!!) I was really spoiled with my QK revolution because I became a TRUE BONAFIED SCRAPper... key word being scraps!! I was able to use up such small pieces by placing them right over the die cut and wow, I could use up a sheet of paper until there was nothing left of it! I really miss that. I miss scrapping too... this has taken up so much time int he learning and experimenting with it :(

... back to the drama!

So, I send the base card to cut and used some advice I got and copied and pasted the exact image 3 times and woudl you believe even though it test cut OKAY!!! The darned card cut what I designed but not all the way through... AGAINNN!!! Grrr how frustrating. No amount of "exacto surgery" could help what I had left to still cut so I was so so soooo disappointed. I honestly don't know what the heck happened :P Needless to say I did not continue and waste even more paper - but packed up the lil one, went to Walmart and spent $5 on a freakin card!!! Grrrr! A nice val card for hubby mind you and CHEAPER than the paper I just bought but so so soooooo disappointing!

Anyway, until we meet again, this is a pic of the unfinished Valentines pop-up that I attempted to create myself. The pop-up is a bit of a problem because I can't alter the outline so the "tabs" are dashed cut instead of a complete cut so lil Taz still separates from the card. I can't tell you enough, despite the new 5.1 version with it's welding, etc - I can't wait for the KNK Studio that I plan to purchase from Sandy at http://www.iloveknk.com/. That woman is just a cutter's angel I tell you. She gets it! She's designed it, cut it, got the Tshirt, wrote the manual and advises on software! WOAHHH!!!! She's my hero and I am buying the program that she endorses, and going to take advantage of the video tutorials she offers with the purchase and from her website. I seriously am salivating and cannot wait!

Speaking of cutter angels, my Guru-cutter friend, Cyndiana Jones flew in to save me when my cuts 'looked like a sugar-loaded 2 year old with a machete made the cutz' hahahaa! I was able to clean my no-sticky-enough cutting mat thanks to her :) C
heck her out at:
Cynful Designs, For A Little Bit of EveryBling! Silhouette Certified by QuicKutz, 07/21/2008
Examples and Project/Item photos below:

Have a great day and I promise when I figure out the Taz card I'll share it with you so stay tuned ;)


Saturday, February 7, 2009

I'm loving the weld function in the RM 5.1 software

So I am still not edu-ma-cated on the inkscape software yet although I now have it installed on my machine. However, I did manage to download the new RoboMaster 5.1 software last night from Quickutz for my original Silhouette machine and it has the weld function so I played with it and made a cute card for my Mummy that of course is yours to play with - ENJOY!!

Have a great day!!
Nikki


P.S. The jpg here is of my first test cut, afterwards, I did clean up the top and bottom ribbon holes to be smaller for the start of the ribbon line and also edited the width of the ribbon holes to be narrower and closer to the width of the ribbon too, so although I haven't cut it again, I am pretty sure it will be even cuter now! I added the "Mummy" cutout using the Lucida Handwriting font that is similar to the QK Marisa font.

LinkWithin

Related Posts with Thumbnails